- Get in Touch with Us

Last Updated: Apr 25, 2025 | Study Period:
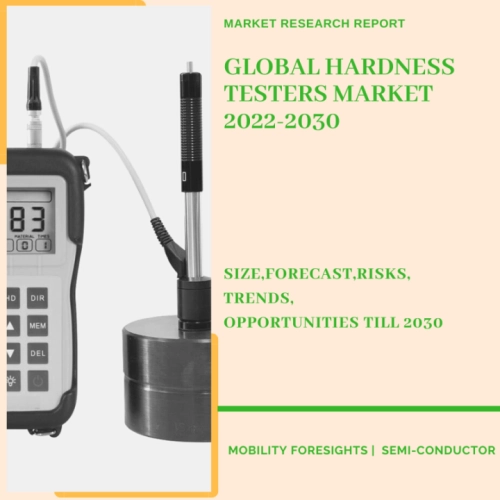
A hardness tester is a tool that determines a material's hardness by measuring the impact on its surface of a localized indentation made by a hard steel, diamond, or carbide indenter. hardness is measured by pressing a ball made of hardened steel or carbide into a surface while applying a defined load, then using a microscope to measure the diameter of the indentation.

The load, measured in kilograms, is divided by the indentation's spherical area, measured in square millimeters; this area depends on the indentation's depth and ball diameter.
This yields the hardness number. In order to test a material's hardness, you normally press an object (an "indenter") into its surface that has been precisely loaded and dimensioned. Measurements of the indenter's penetration depth or the size of the indenter's impression are used to assess the hardness.
The Global Hardness Testers market accounted for $XX Billion in 2023 and is anticipated to reach $XX Billion by 2030, registering a CAGR of XX% from 2024 to 2030.

The novel cantilevered indenter configuration of the Indentron Series hardness testers removes the frictional irregularities common of rival testing devices. These devices abide with ASTM E-18. The Indentron technology ensures precise and reproducible measurements by using precision dead weights.
Both the primary load and the preload are applied using the dead weights. The variance brought on by the flow of the material under load is lessened by automation in timing. The Indentron mechanism prevents the test from being run if the operator accidentally overloads or underloads the preload.
The indenter design makes it feasible to test inside recesses and diameters, which is frequently unachievable with more conventional hardness testers. With the common indenter, inside diameters as tiny as 1-1/2 inches can be checked.
A 1/2-inch diameter can be tested with optional indenters. With the regular indenter, operators may test surfaces that are almost vertical to within 1/4 inch, and with optional special indenters, they can test surfaces up to 3/32 inch. Due to the excellent viewing area, testing is quick and accurate, and there are fewer damaged diamonds.
| Sl no | Topic |
| 1 | Market Segmentation |
| 2 | Scope of the report |
| 3 | Abbreviations |
| 4 | Research Methodology |
| 5 | Executive Summary |
| 6 | Introduction |
| 7 | Insights from Industry stakeholders |
| 8 | Cost breakdown of Product by sub-components and average profit margin |
| 9 | Disruptive innovation in the Industry |
| 10 | Technology trends in the Industry |
| 11 | Consumer trends in the industry |
| 12 | Recent Production Milestones |
| 13 | Component Manufacturing in US, EU and China |
| 14 | COVID-19 impact on overall market |
| 15 | COVID-19 impact on Production of components |
| 16 | COVID-19 impact on Point of sale |
| 17 | Market Segmentation, Dynamics and Forecast by Geography, 2024-2030 |
| 18 | Market Segmentation, Dynamics and Forecast by Product Type, 2024-2030 |
| 19 | Market Segmentation, Dynamics and Forecast by Application, 2024-2030 |
| 20 | Market Segmentation, Dynamics and Forecast by End use, 2024-2030 |
| 21 | Product installation rate by OEM, 2023 |
| 22 | Incline/Decline in Average B-2-B selling price in past 5 years |
| 23 | Competition from substitute products |
| 24 | Gross margin and average profitability of suppliers |
| 25 | New product development in past 12 months |
| 26 | M&A in past 12 months |
| 27 | Growth strategy of leading players |
| 28 | Market share of vendors, 2023 |
| 29 | Company Profiles |
| 30 | Unmet needs and opportunity for new suppliers |
| 31 | Conclusion |
| 32 | Appendix |